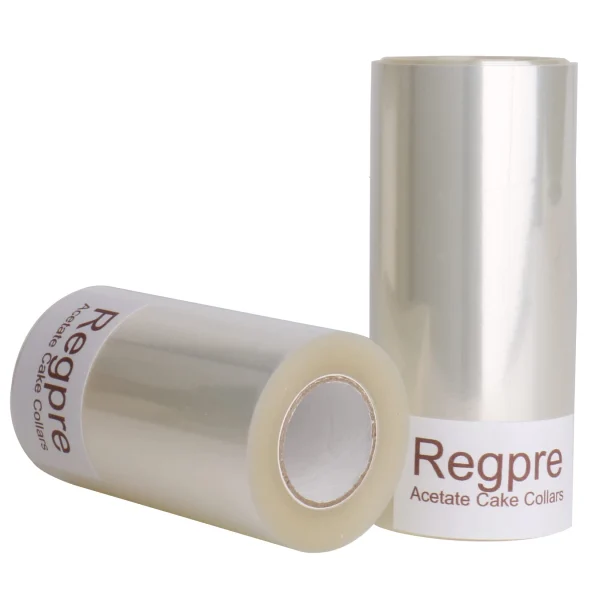
To use a cake collar, cut a strip of clear acetate about 3.14 times your ring’s diameter plus 1 to 2 in of overlap, curl it inside the ring so it springs flat against the wall, and tape the seam on the outside face. Build the dessert, chill it until it is firm all the way through, then lift the ring and peel the film away slowly. Choose a collar at least half an inch taller than the finished dessert: 3 in for a cheesecake or single mousse layer, 4 in for a three-layer ring cake, 5 in for a tall layer cake.
Acetate collars are for cold work only. They shape and protect desserts that set in the fridge or freezer, and they never go in the oven.
What is a cake collar?
A cake collar is a strip of clear, flexible film that stands around the sides of a dessert while it sets. Inside a cake ring or springform pan it acts as a smooth inner wall, so a mousse, a cheesecake filling or a stack of cake layers firms up with straight, glossy sides. Because the film is transparent, you can watch each layer line up as you build. Bakers also call it an acetate cake collar, cake strip, cake acetate or transparent cake collar; they all mean the same thing.
It isn’t the decorative paper or ribbon band some bakers tie around a finished cake for display, and it isn’t a fabric bake-even strip that wraps the outside of a pan in the oven. An acetate collar touches the food and usually comes off before the cake is sliced.
What are cake collars made of?
The name comes from acetate film, but many cake collars sold today are PET (polyethylene terephthalate), a clear plastic that is stiff enough to stand up yet flexible enough to curl. Our rolls are food-grade PET made for direct contact with cakes, mousse and chocolate. The 3 in, 4 in and 3 + 4 in rolls are 125 microns thick (0.125 mm, about 4.9 mil), firm enough to hold a mousse wall and still easy to cut with scissors.
Thickness matters more than the name. Very thin film wraps tiny desserts easily but can buckle under a heavy filling, while much thicker film is hard to curl into a small ring. If a recipe calls for 4.75 mil acetate, 125 microns is very close, since 4.75 mil is about 121 microns.
What are cake collars used for?
- Mousse cakes and entremets, too soft to hold their own sides until set.
- No-bake cheesecakes in a springform pan or cake ring.
- Tall layer cakes built in a ring, with every layer visible from the side.
- Raising the wall of a ring or pan when the dessert will stand taller than the metal.
- Chocolate bands, since set chocolate peels off the smooth film with a glossy face.
- Protecting a finished cake’s sides in the fridge or on the way to a party.
- Frozen desserts such as ice cream cakes.
Which cake collar height do you need?
A common rule of thumb is to pick a collar at least half an inch taller than the dessert you plan to build. The extra height lets a final layer of cream, glaze or fruit gel set level, with a clean top edge.
| Finished dessert height | Collar height | Typical desserts | Our roll |
|---|---|---|---|
| Up to about 2.5 in | 3 in | No-bake cheesecake, single mousse layer, cake slices | 3 in acetate cake collar roll |
| About 2.5 to 3.5 in | 4 in | Three-layer ring cake, entremet with an insert | 4 in cake collar roll |
| About 3.5 to 4.5 in | 5 in | Tall layer cake, deep mousse cake, trifle-style dessert | 5 in acetate roll |
| About 4.5 to 6 in | 4 in plus 3 in, overlapped about 1 in | Extra-tall showpiece cakes | 3 in and 4 in cake collar set |
If you make both short and tall desserts, the two-roll set gives you 65.6 ft in total, split between the two heights most desserts need. A single 5 in strip gives one seamless wall where two narrower strips would leave a faint overlap line. If you only make cheesecakes and slices, compare our picks for 3 inch cake collars.
How long should you cut a cake collar?
Multiply the ring’s diameter by 3.14 to get its circumference, then add 1 to 2 in so the ends overlap and can be taped. Each of our rolls is 32.8 ft (10 m) long; the counts below assume about 1.5 in of overlap and one strip per dessert.
| Ring or pan diameter | Strip length | Strips per 32.8 ft roll |
|---|---|---|
| 4 in (10 cm) | about 14 in | about 28 |
| 6 in (15 cm) | about 20 in | about 19 |
| 8 in (20 cm) | about 27 in | about 14 |
| 9 in springform (23 cm) | about 30 in | about 13 |
| 10 in (25 cm) | about 33 in | about 11 |
For a square ring, add up the four sides plus the overlap instead. The film follows square and freeform rings, though at sharp corners it bends with a slight curve rather than a crisp fold.
How to use cake collars to line a ring
The full sequence is in the steps below. These details decide whether the sides come out clean:
- Start on a flat base. Use a cake board cut to size or a lined tray. For a runny mousse, wrap the bottom of the ring in plastic wrap so filling can’t seep out.
- Let the curl work for you. Cut strips keep the roll’s curl. Set the strip so it curves the same way as the ring and it presses itself against the metal.
- Put the seam at the back. An overlap can leave a faint line, so place it where the cake will face the wall.
- Press each layer to the wall so it meets the acetate all the way around, and tap the board to release air bubbles from a mousse.
How to use a cake collar for cheesecake
For a no-bake cheesecake, line the springform’s side wall with a strip before you press in the crust. The collar keeps the filling off the metal, so when you open the clasp the sides are smooth and you don’t need to run a knife around them. A 3 in collar suits most single-layer no-bake cheesecakes; use a 4 in strip if you plan a topping layer of fruit gel or cream.
A baked cheesecake is different. The acetate is not heat-resistant, so it cannot go in the oven. Bake the cheesecake as usual, cool and chill it completely, unmold it, then wrap a collar around it if you want to hold a topping in place or protect the sides.
How to use acetate sheets for tall layer cakes
Ring-built layer cakes, with every layer visible through the side, are where acetate earns its keep. Bake a thin sheet cake, cut rounds with the ring, and line the ring with a collar on a cake board. Lay in a round, add filling, and keep stacking, pressing each layer gently so it meets the film.
When the cake will stand taller than one strip, slide a second strip between the ring and the first collar as the layers rise, overlapping it by about an inch. With a 4 in and a 3 in strip, the wall reaches close to 6 in. Tape both seams on the outside and chill the cake overnight before you lift the ring.
How to put on a cake collar around a finished cake
You can also wrap a transparent cake collar around the outside of a cake that is already built, for example to hold soft frosting in place during transport or to set a chocolate band. Chill the cake first so the surface is firm. Measure around it with a strip of film or a piece of string, cut the acetate with about an inch to spare, wrap it snugly, and tape the overlap on the outer face.
How to remove a cake collar without marking the cake
- Chill long enough. As a rule of thumb, a mousse cake needs several hours and often overnight, until the center is as firm as the edges. Some bakers freeze mousse cakes, peel while frozen for the sharpest edge, then thaw them in the fridge.
- Lift the ring first. With acetate between dessert and metal, the ring slides straight up.
- Peel low and slow. Draw the film back from the seam, close to the cake’s surface rather than pulling it outward.
- Stop if it drags. Put the cake back in the fridge or freezer for a while, then try again. A warm surface smudges, so peel cold.
Cake collar ideas and DIY tricks
DIY acetate cake collar strips
Need a 2 in collar for bars or mini cakes? Mark the width along a metal ruler and cut the strip lengthwise with a craft knife or rotary cutter on a cutting mat; long scissor cuts tend to wander. A 5 in strip splits neatly into a 3 in and a 2 in band, and a 3 in strip into a 2 in band plus a 1 in offcut for chocolate decorations.
A collar without a ring
For small desserts you can skip the metal ring. Curl a strip into a loop, overlap the ends, tape the outside and stand the loop on a cake board or tray. A free-standing loop holds less weight than a lined ring, so as a rule of thumb keep it to small diameters and fillings that set firm.
Chocolate bands and patterns
Spread tempered chocolate thinly over a strip, wait until it just starts to thicken, wrap it around a chilled cake and chill again before peeling. For a lace look, pipe lines or dots of chocolate onto the strip instead. A band around a single slice also keeps it upright in a box.
Can you use parchment instead?
In a pinch, a doubled strip of parchment can line the side of a no-bake cheesecake. It is softer and wrinkles more easily, though, and leaves matte sides rather than glossy ones.
Cake collar mistakes beginners make, and how to fix them
| Mistake | What happens | Fix |
|---|---|---|
| Cutting the strip to the exact circumference | A gap opens at the seam and filling leaks | Add 1 to 2 in of overlap |
| Taping on the inside | Tape touches the food and can pull at the layers | Tape the outer face only |
| A collar shorter than the dessert | The top layer spills or sets with a ragged edge | Go half an inch taller, or stack two strips |
| Building with warm cake layers | Fillings melt and layers slide | Cool layers completely first |
| Peeling too soon | Mousse tears or smears | Chill until firm through, or freeze briefly |
| Using a creased strip | Marks print onto the sides | Use a fresh, flat strip |
| Putting the collar in the oven | The film is not heat-resistant | Bake first, then collar the cooled cake |
Store rolls in their packaging or a flat drawer, away from heat and sunlight, so the film stays clear. For more baking tools, browse our kitchen and baking supplies.
Step by step
- Pick the collar height
Choose a collar at least half an inch taller than the finished dessert: 3, 4 or 5 in, or two strips overlapped for extra-tall cakes.
- Measure and cut the strip
Multiply the ring's diameter by 3.14 and add 1 to 2 in, about 20 in for a 6 in ring. Cut square to the edge with sharp scissors.
- Set up a flat base
Stand the ring on a cake board cut to size or a lined tray. For mousse, wrap the bottom of the ring in plastic wrap to stop leaks.
- Line the ring
Curl the strip inside so it curves the same way as the ring and springs flat against the wall, with the seam at the back.
- Tape the seam outside
Hold the overlap with a small piece of tape on the outer face, so tape never touches the food.
- Build and chill
Add layers, pressing each one out to meet the acetate, then chill until firm all the way through, often several hours or overnight.
- Lift and peel
Lift the ring straight up, find the seam and peel the film back slowly along the surface while the dessert is still cold.
Frequently asked questions
Can acetate cake collars go in the oven?
No. Our acetate is not heat-resistant, so keep it out of the oven and away from hot pans. Bake and cool the cake first, then build or wrap it in the collar and chill it to set.
Are acetate cake collars food grade?
Our rolls are food-grade PET made for direct contact with cakes, mousse and chocolate. Keep them clean and dry in their packaging until you cut a strip.
Do I need a cake ring to use a cake collar?
Not always. You can line the side of a springform pan, tape a strip into a free-standing loop for small desserts, or wrap a collar around the outside of a chilled cake. A ring gives the most support for tall or soft fillings.
What size cake collar do I need for a 6 inch cake?
Cut the strip about 20 in long so the ends overlap. For height, a 3 in collar suits a cheesecake or single mousse layer, a 4 in collar a three-layer cake, and a 5 in collar a tall layer cake.
Why is there a line on my cake where the collar was?
It is usually the seam or the overlap between two stacked strips. Turn the seam to the back, smooth the film before you fill, or use one wider strip so there is no second overlap.
Can you reuse acetate cake collars?
Strips from our 4 in roll can be hand-washed in warm, soapy water, dried flat and stored. Replace any strip that is creased or scratched, because those marks print onto the next cake.
Is 125 micron acetate stiff enough for a tall cake?
Yes, when it lines a ring, because the metal carries the weight and the film only shapes the side. A free-standing loop with no ring holds less, so keep those to small, firm-setting desserts.