How to use a drill stop collar, in short: lock it on the bit so the gap from the tip to the collar’s lower face equals the depth you need plus the length of the bit’s cone-shaped point, then drill until the collar touches the surface. A drill stop collar, also sold as a drill depth stop, is a steel ring held on the bit by a set screw, so the bit can’t go any deeper.
On a 118° twist bit that point is about 0.3 × the diameter long, the number most instructions leave out. Below are the figures for each size in our metric drill bit depth stop collars and a worked dowel example.
What is a drill stop collar?
A drill stop collar is a short steel ring with a bore sized to one drill bit and a set screw that clamps it anywhere along the bit.
When the collar meets the workpiece, the bit can’t feed further, so every hole at that setting ends at the same depth. A flag of tape only shows where to stop; a collar actually stops the bit.
What do I use a drill stop collar for?
Use a drill stop collar for any hole that must end at a set depth: dowel holes, 5 mm shelf-pin rows, screw pilot holes and holes that mustn’t break through.
- Dowel joints. Both halves need matching depths, or the dowel bottoms out on one side and the joint won’t close.
- Shelf-pin rows. Hettich’s drilling template for the 32 mm cabinet system (System 32) lays out 5 mm (or 3 mm) holes on a 32 mm grid, 37 mm from the front edge of the cabinet side, 29 holes per run. A collar keeps each one from breaking through the outside face.
- Pilot holes. Drill every pilot to the screw’s length, the same for each screw in a hinge leaf or a row of hardware.
Through holes don’t need a collar. For a drawer knob’s screw hole, a scrap block clamped behind the exit point matters more, as covered in how to install drawer knobs.
Which drill stop collar fits which bit?
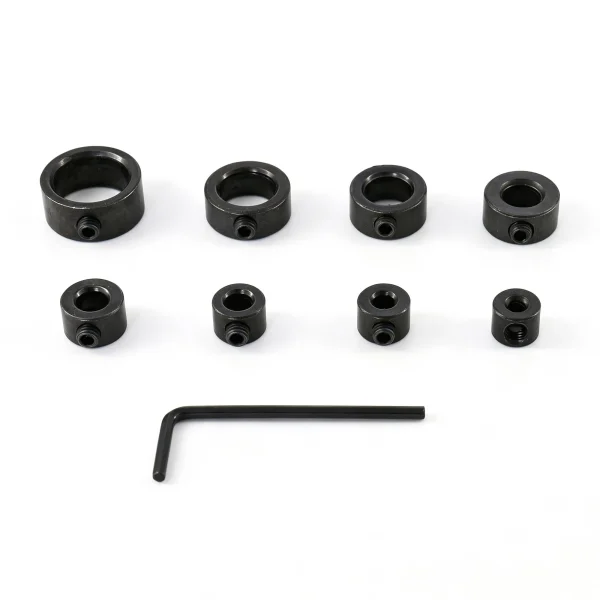
Match the collar’s labeled bore to the bit’s diameter: the Inxens set has 3, 4, 5, 6, 8, 10, 12 and 16 mm collars, and each bore is fixed.
The table gives inch equivalents, the largest fractional-inch bit that still slides through each collar (with its play) and the point length to add on a 118° twist bit.
| Collar | Inches | Inch bit that fits (play) | 118° point length | Typical stopped holes |
|---|---|---|---|---|
| 3 mm | 0.118 in | 7/64 in (0.22 mm) | 0.9 mm | Pilot holes for small screws |
| 4 mm | 0.157 in | 5/32 in (0.03 mm) | 1.2 mm | Pilot holes for larger screws |
| 5 mm | 0.197 in | 3/16 in (0.24 mm) | 1.5 mm | Shelf-pin holes |
| 6 mm | 0.236 in | 15/64 in (0.05 mm) | 1.8 mm | 6 mm dowels |
| 8 mm | 0.315 in | 5/16 in (0.06 mm) | 2.4 mm | 8 mm dowels |
| 10 mm | 0.394 in | 25/64 in (0.08 mm) | 3.0 mm | 10 mm dowels |
| 12 mm | 0.472 in | 15/32 in (0.09 mm) | 3.6 mm | 12 mm dowels, larger stopped holes |
| 16 mm | 0.630 in | 5/8 in (0.13 mm) | 4.8 mm | Large stopped holes |
The nearest inch size isn’t always one that fits: 13/64 in is closest to 5 mm but measures 5.16 mm, too big to pass through, while 3/16 in fits with 0.24 mm (0.009 in) of play. A 1/4 in bit (6.35 mm) won’t enter the 6 mm collar, and a 1/2 in bit (12.7 mm) won’t enter the 12 mm one. In a loose bore the set screw pushes the bit to one side, so with more than about 0.1 mm of play, check that the collar sits square and recheck the depth.
How to set the depth: measure from the tip, then add the point
Set the collar at the full-width depth you need plus the point length, which on a 118° twist bit works out to about 0.3 × the bit diameter.
Mitsubishi Materials, a cutting-tool maker, notes in its drilling course that high-speed steel twist drills usually have a 118° point angle. Each cutting edge then slopes at 59° to the bit’s axis, so the cone’s length is half the diameter divided by tan 59°, or 0.30 × the diameter. The hole reaches full width only where the cone ends, so a flat-ended dowel or pin can’t use the cone’s depth.
If a bit’s package lists a flatter 135° point, use about 0.21 × the diameter instead. Brad-point bits for wood cut a nearly flat bottom and leave only a small dimple from the center spur, so measure their setting from the cutting edges at the rim, not the center spur.
Worked example: an 8 mm × 30 mm dowel
Each hole needs half the dowel length, 15 mm, plus room for glue. Plan on 1 to 2 mm extra; with 1 mm, each hole needs 16 mm of full-width depth.
- Point length for an 8 mm, 118° bit: 0.3 × 8 = 2.4 mm.
- Collar setting from the tip: 16 + 2.4 = 18.4 mm, so set the collar’s lower face about 18.5 mm from the tip.
- Check in scrap: push a dry dowel to the bottom of a test hole and measure what sticks out. It should be about 14 mm (30 − 16).
Set the collar 16 mm from the tip instead and each hole has only about 13.6 mm of full width. Two holes then hold 27.2 mm of a 30 mm (about 1-3/16 in) dowel, so the joint can stay open by up to 2.8 mm (about 7/64 in), less any chamfer on the dowel ends.
How to use a drill stop collar, step by step
Setup takes six steps, from disconnecting the drill to stopping the moment the collar touches the surface.
- Disconnect the drill. Unplug it or take the battery out. OSHA’s Hand and Power Tools booklet lists disconnecting tools when changing accessories such as bits among its general precautions.
- Slide on the matching collar. Use the collar labeled with the bit’s diameter, on the fluted part of the bit.
- Set the distance. Measure from the tip to the collar’s lower face with a steel rule or a caliper’s depth rod.
- Lock it. Turn the collar so the set screw bears on a land, the raised spiral between the flutes, not in a flute groove. Tighten with the hex key until you can’t push the collar by hand, and no further; overtightening can strip the screw or mark the bit.
- Test in scrap. Drill an offcut of the same material and dry-fit the dowel, pin or screw.
- Clamp, drill and stop on contact. Clamp the workpiece, slow the feed as the collar nears the surface and stop when it touches. On deeper holes, back the bit out once or twice to clear chips.
Pressing a spinning collar into the wood adds no depth; it scorches a ring and can work the set screw loose. In a long batch, hold the bit against your test hole now and then to confirm the collar hasn’t crept.
Drill stop collar safety
Clamp the work, wear safety glasses, skip gloves and keep sleeves and jewelry clear, because a collar adds a spinning steel ring close to your hands.
OSHA’s booklet tells users to secure work with clamps or a vise so both hands are free to operate the tool, and warns that loose clothing, ties or jewelry can become caught in moving parts. The drill press procedure from California State University, Northridge requires safety glasses, says gloves must not be worn and lists hair, clothing and gloves caught in the spindle as an entanglement hazard; the same reasoning applies to a collar turning on a handheld drill. Never stop a spinning bit or collar with your hand.
A collar can leave a polished ring or a shallow dent on soft wood such as pine. A strip of masking tape or electrical tape on the surface takes the rub; if the depth is tight, add the tape’s thickness, a fraction of a millimeter, to the setting.
Caring for the collars
The 8 collars are black carbon steel, so wipe off dust and sap, dry them and store them away from moisture with the L-shaped hex key.
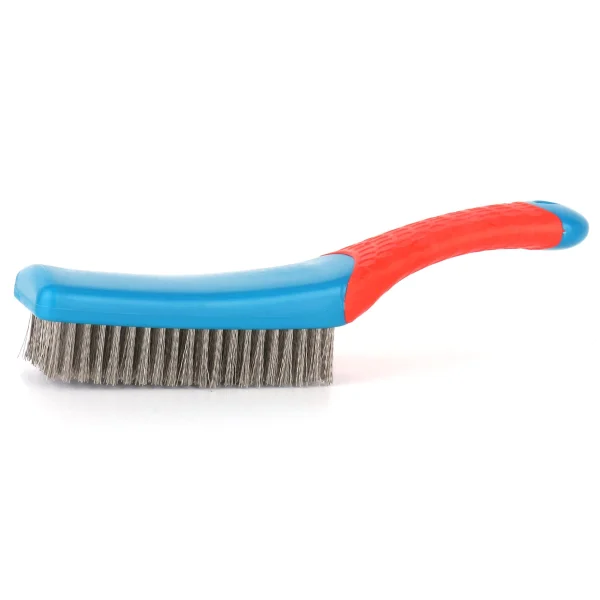
If a collar picks up light surface rust in a damp shop, a few strokes of a hand wire brush clear it, though they also wear the black finish. Check that the set screw still turns freely before you rely on the collar again. More workshop basics are in tools and hardware.
Step by step
- Disconnect the drill
Unplug the drill or remove its battery before you fit or adjust a collar on the bit.
- Pick the matching collar
Use the collar whose labeled bore equals the bit's diameter; a looser collar can't hold the bit centered.
- Work out the setting
Add the point length, about 0.3 × the diameter on a 118° twist bit, to the full-width depth you need.
- Set and lock the collar
Slide the collar to that distance from the tip, turn the set screw onto a land rather than a flute, and tighten until you can't push the collar by hand.
- Test in scrap
Drill an offcut of the same material, dry-fit the dowel, pin or screw, and adjust the collar until it fits.
- Clamp, drill and stop on contact
Clamp the work, slow down as the collar nears the surface, stop when it touches, and recheck the collar every few holes.
Frequently asked questions
Will metric stop collars fit a 1/2 in drill bit?
No. A 1/2 in bit measures 12.7 mm, which won't pass through a 12 mm collar and leaves 3.3 mm of play in a 16 mm collar, far too loose to stay centered. For 1/2 in bits, use an inch-sized collar.
Do I need a different stop collar for each drill bit size?
Yes. A collar's bore is fixed, so it only grips a bit of the same diameter, which is why the set includes eight sizes from 3 mm to 16 mm. What you adjust is the collar's position along the bit.
Should I measure the collar setting from the tip of the bit?
Measure from the tip, then add the point. On a 118° twist bit the cone is about 0.3 × the diameter long (1.8 mm on a 6 mm bit), and that part of the hole is narrower than the bit, so a dowel or shelf pin can't use it.
How deep should a dowel hole be?
Plan on half the dowel's length plus 1 to 2 mm per side for glue. For a 6 mm × 30 mm dowel that is 16 to 17 mm of full-width depth, or about 17.8 to 18.8 mm from the tip of a 118° bit to the collar.
Can I use a stop collar on a drill press?
Yes, but most drill presses have a depth stop on the quill that does the same job without a ring spinning near the work. A collar is most useful on a handheld drill, where it is the simplest way to get a hard stop at a set depth.
Why does my drill stop collar slip?
Usually the set screw is sitting in a flute groove instead of on a land, the collar is slightly larger than the bit, or the collar is being pushed hard against the work. Turn the collar so the screw bears on a land, check the bit size, snug the screw again and stop drilling as soon as the collar touches.
What comes in the Inxens stop collar set?
Eight black carbon steel collars, one each in 3, 4, 5, 6, 8, 10, 12 and 16 mm, and one small L-shaped hex key for the set screws. Drill bits and a storage case are not included.